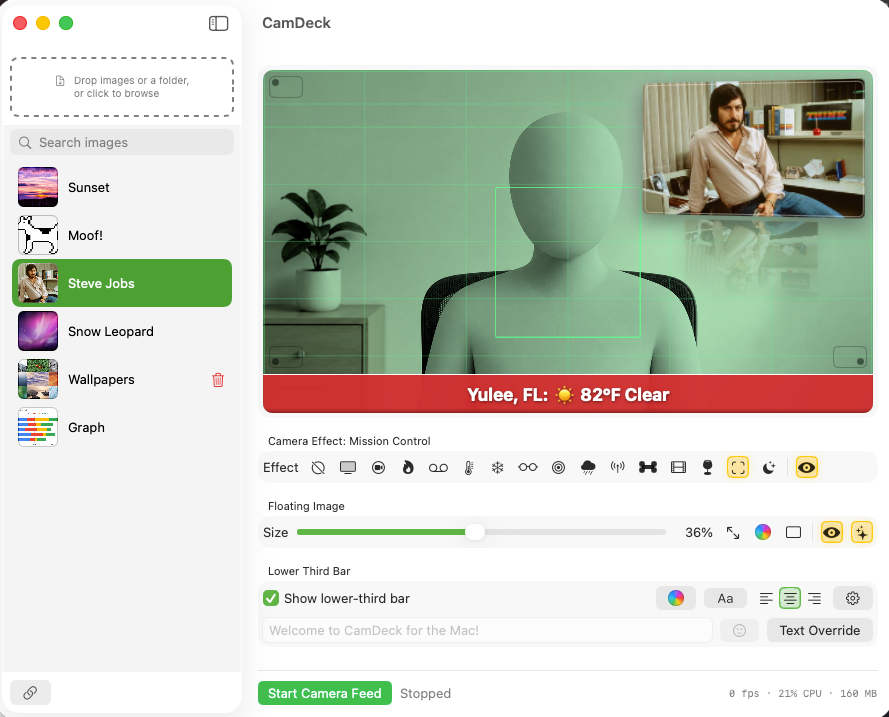
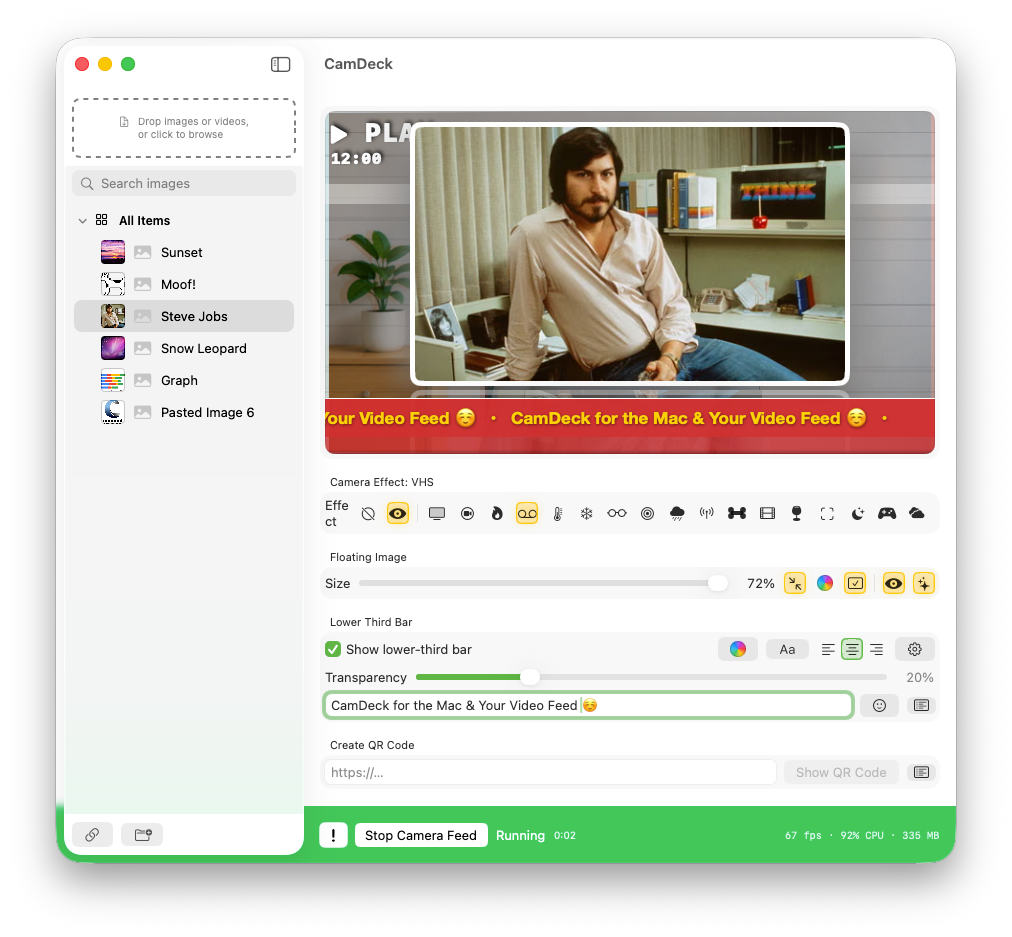
CamDeck floats an image over your webcam feed, adds a live lower-third text/weather bar, applies real-time video effects, and sends the whole composited picture to Zoom, Google Meet, or any app as its own camera called CamDeck. It runs as a small macOS camera extension plus a host app you control everything from.
Doesn't work in FaceTime. Apple restricts FaceTime from using third-party virtual cameras, so CamDeck won't show up there — that's an Apple limitation, not a CamDeck bug. It works normally in Zoom, Google Meet, QuickTime, and most other apps that read your Mac's camera.
Image & video library
Drag images or video clips (.mp4, .mov, and similar) into the sidebar well, or click it to browse. Videos are copied into CamDeck's own storage, so they keep working even if you move or delete the original file.
Paste an image URL to download one directly, or copy any image (a screenshot, a picture from a webpage) and press ⌘V anywhere in the window to add it straight from the clipboard. URL import is image-only.
The search field under the drop zone instantly filters the library by name as you type — while searching, folders are set aside and results show as a flat list.
Drag to reorder (only while the search field is empty); hover a thumbnail for a one-click delete.
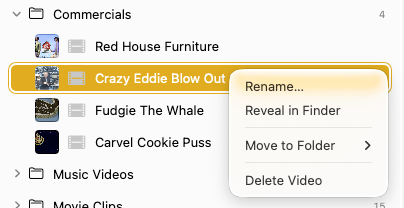
Right-click an image for Rename… and Reveal in Finder, or a video for Delete Video and Reveal in Finder.
Click an image to make it the live overlay instantly, or a video to load it for playback.
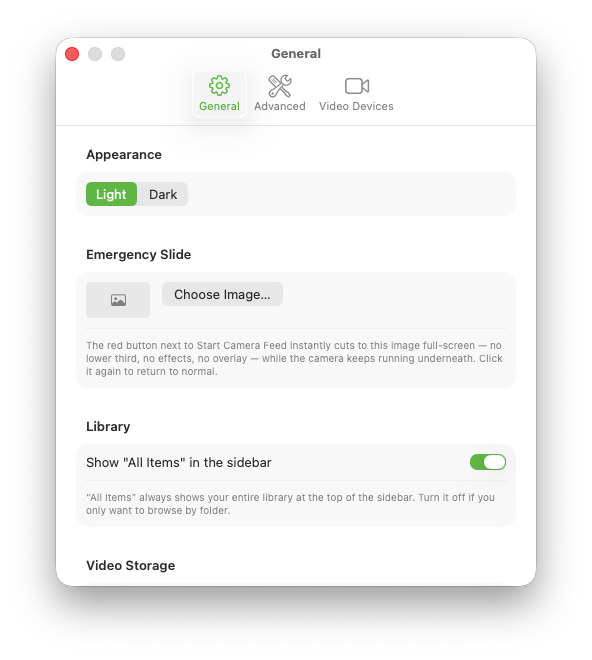
Settings → General shows how much disk space stored videos are using, with a shortcut to that folder in Finder.
Organizing with folders
Click the new-folder button in the sidebar toolbar to create a folder — you'll be prompted to name it right away.
All Items is a pinned view at the top that always shows your whole library, no matter which folder things are in.
Right-click any image or video and choose Move to Folder to file it away, or Remove from Folder to send it back to All Items. An item lives in one folder at a time.
Drag folders up and down to reorder them, and drag items to reorder within a folder — both orders are remembered.
Click a folder's disclosure triangle to expand or collapse it; that state is remembered too.
Right-click a folder to Rename it or Delete it — deleting a folder never deletes what's inside; everything just moves back to All Items.
Playing video overlays
Select a video in the library to load it — you'll see a poster frame with Play, Stop, and Rewind controls, plus its name and length.
Press Play and the video takes over the entire CamDeck output, replacing your live camera — the lower-third bar still layers on top if it's on.
A draggable progress bar shows elapsed and total time and lets you jump to any point, and an independent volume slider controls the video's own audio separately from your Mac's system volume — both are remembered across videos and launches.
Click Live Camera on the preview at any time to switch straight back to your webcam, or just select an image in the library.
A picture-in-picture button lets you keep your live camera visible in a corner while the video plays, so you can react or narrate on camera.
Any of the 20 real-time effects can be applied to a playing video, exactly like the live feed.
Floating-image controls step aside automatically while a video plays, since an image can't float over full-frame video — they come back the moment you return to the live camera.
If a video's source file has been moved or deleted, CamDeck shows a clear "file is missing" message instead of silently failing to play.
No audio into your call. The volume slider only controls what plays out of your Mac's speakers — CamDeck sends video only, so a playing clip's sound doesn't reach Zoom, Meet, or any other call by itself. If you need viewers to hear it, route your Mac's audio through a virtual audio device (like BlackHole) into your call's microphone input.
Play as Channel
Right-click any folder that contains videos and choose Play as Channel to auto-play every video inside it in order.
When the last video finishes, it loops back to the first — just like a real TV channel that never goes off air.
A Next button skips ahead to the next video manually whenever you want, and an Up Next label shows what's coming so you can set up the transition.
Everything else about video playback still applies — effects, the progress bar and volume slider, picture-in-picture, and the Live Camera switch.
Mini Window
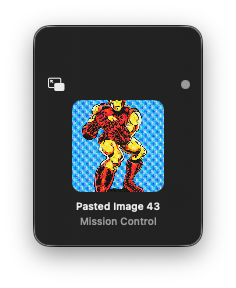
Click the button next to the sidebar toggle in the titlebar to shrink CamDeck down to a small floating panel.
The panel shows what's currently on air — the image, its name, the active camera effect, and whether the feed is running — so you can keep an eye on the show without the full window taking up screen space.
Click the panel's own button to bring the full window back.
It remembers wherever you last dragged it.
Emergency Slide
Pick a standby image once in Settings → General, then a button next to Start/Stop Camera Feed instantly cuts your entire output to that full-screen image — no video, effects, overlay, or lower third.
Your camera keeps running underneath the whole time, so switching back off is just as instant as switching it on.
Built for the moment something goes wrong on camera and you need a clean cut, right now, without fumbling through settings.
QR Code overlay
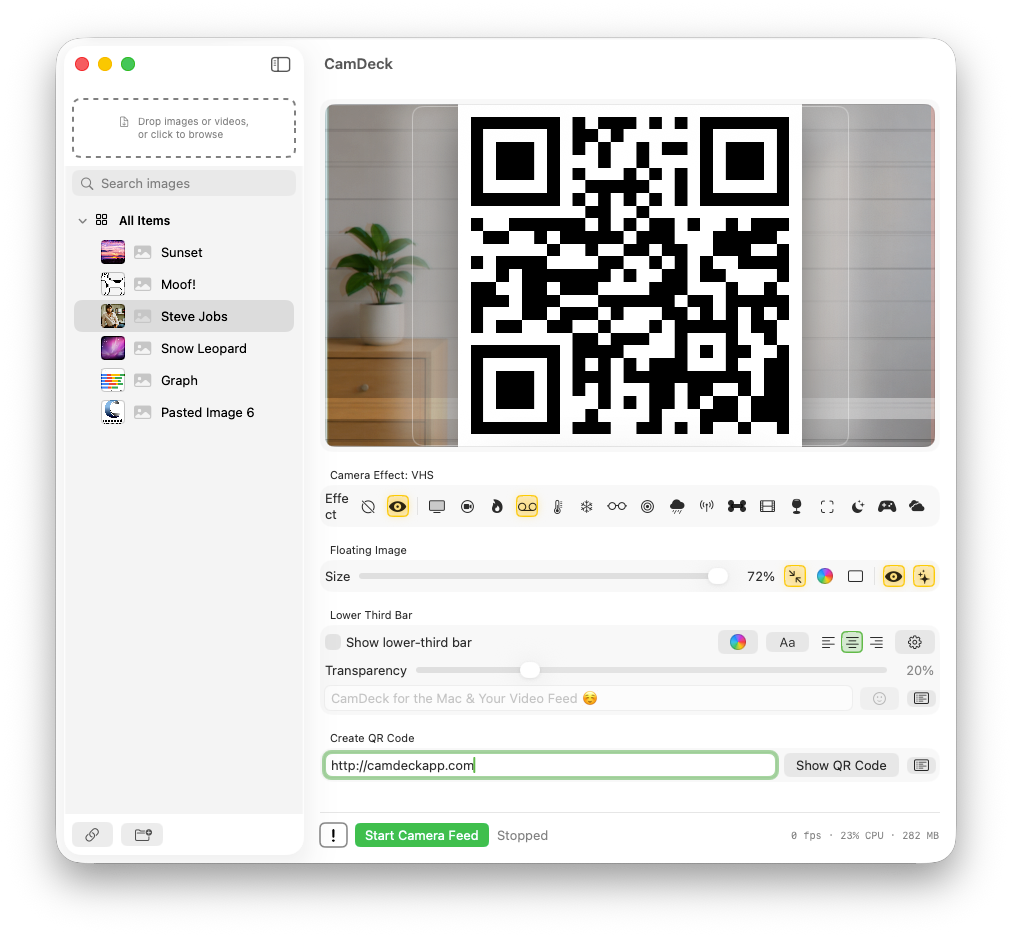
Type a URL, phone number, or any plain text into the QR Code URL field at the very bottom of the main window, then click Show QR Code to turn it into a QR code and drop it into the floating-image slot.
Click the Clear button next to Show QR Code to take the QR code down and restore whatever image was showing before it.
It uses whatever corner, size, and Fancy Mode settings are already set — generating a QR code replaces whatever image was there, exactly like picking a new image. It's one or the other, never both at once.
The list icon next to the button saves and recalls snippets — the same Save Current Text, pick-from-a-menu, and Manage Snippets… structure as the lower-third bar's presets, just aimed at this field instead.
The button is disabled while a video is playing, since the floating-image slot isn't available then either.
Placement & size
Show Floating Image toggles the overlay off entirely for a clean camera feed — your image and its placement are remembered for when you switch it back on.
Click any corner button directly on the preview to move the overlay there.
Drag the Size slider to resize it live, or use the 25%/50%/75% quick-size presets and reset button next to it to jump straight to a round size.
The expand icon "blows up" the image to the largest size that fits — centered, clearing the lower-third bar if it's on. Click again to snap back.
A Transparency slider fades the image, its border, and its shadow together — it runs solid at the right, fading toward see-through as you drag left, and defaults to fully solid. It's forced solid while a QR code is showing, since a see-through QR code can fail to scan.
The bordered-square icon opens a 14-color quick popover for the image's frame; the checkmark-rectangle icon next to it turns that frame border on or off entirely.
Fancy Mode adds a soft reflection, subtle 3D tilt, a highlight edge, and a glow behind the floating image, for a more polished look.
Lower-third bar
Toggle it on/off and type text right on the main window — built for changing on the fly, mid-show.
A transparency slider sits right under the toggle on the main window, so you can adjust the bar's see-through-ness without opening any panel — it runs solid at the right, fading toward see-through as you drag left, and defaults to fully solid.
The smiley-face button focuses the text field and opens the macOS emoji picker so you can drop an emoji straight into the bar text.
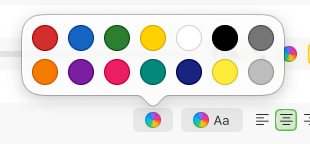
The alignment buttons (left/center/right) and the bar-color and text-color swatch buttons all live right on the main window for quick mid-show changes, each with a 14-color quick palette.
The presets menu (list icon) saves canned phrases like "Bathroom Break" for one-click reuse, each with its own delete button.
The gear icon opens the full design panel — text color, alignment, scroll speed, a "Text Shadow" checkbox, an "Allow Any Text to Scroll" option to force scrolling even on short text, and "Freeze Scrolling Preview to Save CPU" (the outgoing feed keeps scrolling normally — only the on-screen preview pauses).
Weather mode replaces the typed text with live conditions for a zip code you set, refreshed every 10 minutes.
Now Playing mode replaces the typed text with whatever's currently playing in Spotify or Music (Spotify takes priority if both are playing). The first time it's turned on, macOS will ask permission to let CamDeck see what Spotify/Music are doing — that's expected, just approve it.
RSS mode tickers headlines from any news feed URL you set, refreshed every 5 minutes — always scrolling, regardless of length.
Video Title mode shows the name of whatever video overlay is currently playing, and falls back to your typed text when nothing's playing.
Countdown mode counts down to a date and time you set — name the event, pick the date, and the bar shows something like "Countdown to CamDeck's Beta Release: 15 days." Good for launch dates, show start times, or any on-air deadline.
Weather, Now Playing, RSS, Video Title, and Countdown are mutually exclusive — turning one on switches the others off automatically.
Google Meet mode — the "Adjust Bottom Bar for Google Meet Calls" toggle in the design panel grows the bar's solid color down to the true bottom edge and lifts the text up, so Meet's camera cropping and zooming doesn't clip it. Leave it off for Zoom and other apps that don't crop the feed.
Camera & effects
Settings → Video Devices lets you pick a specific physical camera if you have more than one connected.
The Effect row applies a real-time look to the video itself — each one a distinct filter, not just a color tint. Effects work on a playing video overlay exactly the same as they do on your live camera:
Old TV — black & white, heavy contrast, rolling scanlines and picture-tear, film grain.
Security Cam — cool desaturated tone with a CCTV-style "CAM 01 / REC" readout and timestamp.
Flame — dozens of individually drawn flame tongues across three depth ranks, white-hot at the base and cooling to dark red at the tip, with ragged torn edges, additive overlap so flames burn brighter where they overlap, a bed of glowing coals, detached flame pockets that float up, real ember particles, and heat shimmer above the fire — weighted toward the left/right edges so it frames you rather than covering your face.
VHS — color-channel bleed, tracking-glitch bands, a pixelated "▶ PLAY" counter, a fake "12:00" clock, and a classic camcorder battery icon top-right.
Thermal — real blue-to-red heat-map luminance mapping.
Holiday Mode — four depth layers of snow driven by a shared wind gust, snow piling up along the bottom edge with a lit rim, frost creeping in at the corners, and a string of Christmas lights along the top/upper sides with individually chasing, twinkling, multicolor bulbs that periodically flash together. Warm cozy grade, no blur — your face stays sharp.
3D — genuine red/cyan anaglyph "3D glasses" processing.
CyberOps — falling green digital-rain code over a darkened silhouette.
NightOps — pure red-on-black night-vision-style look.
Local Cable — washed color, fuzzy signal, scanlines, a burned-in yellow station ID and blinking "LIVE" timecode — the vintage local-access-channel look.
X-Ray — an inverted, navy-and-icy-cyan radiograph look (not thermal — a genuine photographic negative technique).
Noir — classic moody black & white film noir with deep blacks and a dark vignette.
Drunk Mode — over-the-top double vision, heavy motion-trail shake, and a warm woozy color grade. Not for serious broadcast moments.
Mission Control — a dense green NASA-telemetry HUD: grid lines, a tracking bracket, scrolling readouts, a radar sweep, and a mission clock, over a cool technical grade.
Dream Sequence — a soft glowing flashback look with a liquid ripple, drifting pastel color wash, floating light orbs, twinkling sparkles, and a breathing "zoom burst" radiating from center.
Game Boy Arcade — the classic 4-shade green Game Boy palette with real pixelation, plus a working arcade HUD: 1P, HI score, a live ticking score, lives, and an occasional floating "+100."
Ghost Hunter — night-vision grain, a spiking EMF meter, a draining battery and temperature readout, a radar sweep, a periodic "signal freeze" glitch, and flashing "ANOMALY DETECTED"/"PLASMA SPIKE DETECTED" alerts.
Weather Report — a rounded, condition-tinted glass card in the corner with current conditions, feels like, humidity, UV index, rain chance, sunrise/sunset, and a 3-day forecast. Not available while a video is playing.
City Life — a monochrome night skyline framing either side of you, a full moon and drifting clouds, and thousands of windows lighting up block by block. Rolling blackouts take out whole chunks of the skyline, searchlights sweep overhead, a distant airliner crosses with a red beacon and white strobes, and rooftops carry slow-pulsing red antenna lights. Lit windows stay warm yellow — the one spot of color in the scene.
Confetti — paper confetti tumbling and swaying across the picture, catching the light as each piece flips edge-on. Unlike the night effects, the camera picture itself is barely touched — it's meant to look like an ordinary, well-lit shot with confetti falling across it.
Start/Stop Camera Feed shows a live broadcast timer next to the button while running.
Preview & going live
Right-click any image and choose Preview Image…, or use the panel button in the sidebar footer, to open the Preview panel at the bottom of the sidebar — it shows the image large, before your viewers see it, so small thumbnails are never a guessing game mid-show.
Click Send to Air (or press ⌘↩) to put the previewed image out on your live feed.
Turn on Settings → General → Live Show → "Always preview images before sending them to air" to keep preview mode on permanently — pasted, downloaded, and dragged-in images all get staged for review first instead of going out unseen.
Right-click any image and choose Set as Default Image to designate a standby image for between segments, then click Send Default to Air in the Preview panel any time you need a clean cutaway in one click.
Sticky paste destination
Right-click a folder and choose Paste New Images Here to arm it — from then on, every ⌘V files itself directly into that folder instead of landing in All Items to be dragged out afterward.
This setting is sticky across launches, so you can arm it once before a show and forget about it.
Signed & notarized by Apple
CamDeck isn't on the Mac App Store, but that doesn't mean it's unchecked. It carries a Developer ID from Apple and has been through Apple's notarization process — the same automated security scan Apple runs on every app before it's allowed to run smoothly outside the App Store.
In practice, that means: Apple has scanned CamDeck for known malware, the app is cryptographically signed so macOS can verify it hasn't been tampered with since it left our hands, and Gatekeeper will let it open normally — no right-click-and-"Open anyway" workaround required, no "unidentified developer" warning. If macOS ever does show a warning, don't open it; download the DMG again from this site instead.
Developer ID signedNotarized by ApplePasses Gatekeeper
First-time setup
Drag CamDeck.app into Applications from the installer disk image.
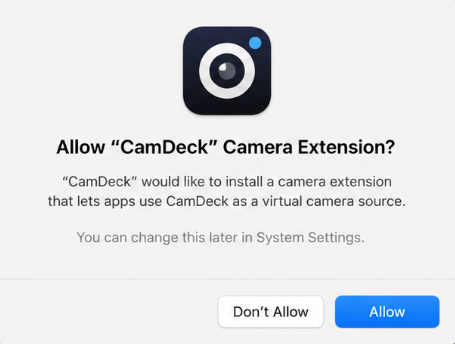
Launch it — macOS will show a dialog asking to allow the CamDeck camera extension. Click Allow. If you click Don't Allow by mistake, a banner on the main window will bring you right back so you can turn it on from System Settings instead.
The first time you click Start Camera Feed, macOS will separately ask for camera permission.
Add an image, pick a corner, and click Start Camera Feed.
In Zoom (or anything else), choose CamDeck from the camera list.
Known limitations
Photo Booth crops overlays at the edges. CamDeck's virtual camera publishes a single fixed 16:9 frame. Photo Booth's capture window isn't 16:9 — it's closer to 4:3/square — and since it only offers one format, it doesn't letterbox the mismatch; it crops to fill its own window, cutting off the left/right edges where overlays, lower-third text, and effect graphics sit. Zoom, Meet, and most other apps letterbox or resize instead, which is why this is specific to Photo Booth rather than a CamDeck bug. If you use Photo Booth, keep overlays and lower-third text away from the far left/right edges.
Credits
CamDeck is built and maintained by one independent developer, with early direction and testing help from a couple of collaborators along the way.
Found this useful? CamDeck is free to run forever, entirely tip-supported. If it earns a place in your workflow, a tip on Buy Me a Coffee helps keep new effects and features coming.